.png)
Video Optimization
Cimo automatically optimizes your videos as soon as you upload them. When working inside the WordPress Block Editor, simply insert a Native Video Block and upload your video to the Media Library. Cimo will instantly convert the file to .mp4 format for improved performance.
To verify that a video has been optimized, open the video in the Media Library and check the information panel on the right. If optimization is successful, you will see a “Video Optimized by Cimo” notice.
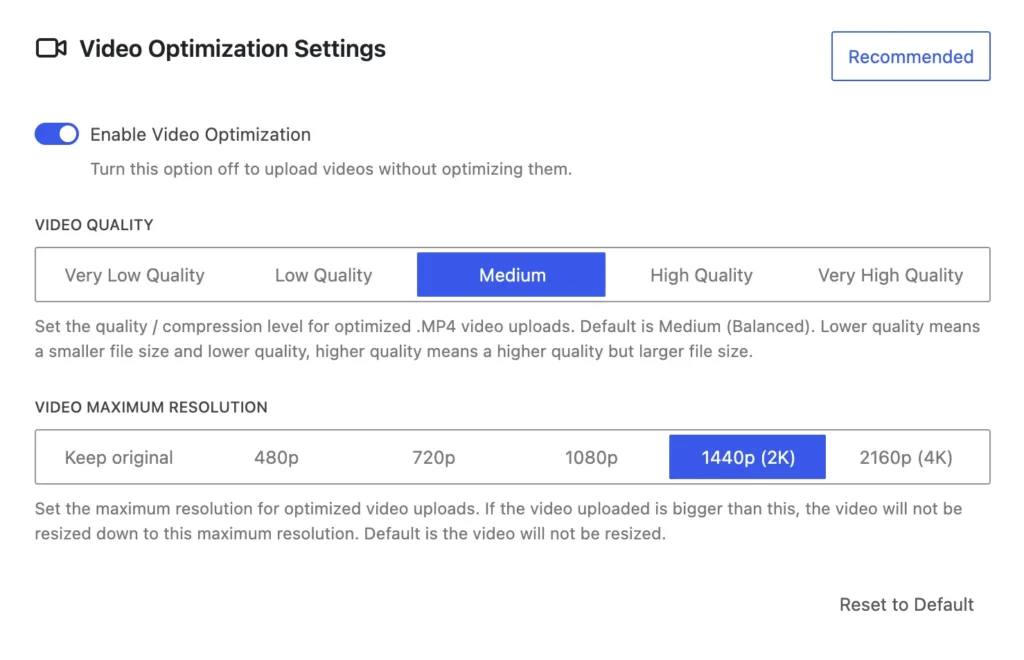
The Video Optimization Settings let you control how your video uploads are processed. You can enable or disable Video Optimization depending on whether you want your videos to be optimized during upload. If you turn this option off, videos will be uploaded without any optimization.
💡 You can click on the Recommended button for a preset of our recommended settings for Video Optimization.
You can adjust the Video Quality setting to choose the compression level for optimized .MP4 files. The default quality setting is Medium (Balanced). Lower quality settings produce smaller file sizes with reduced quality, while higher quality settings provide better visual output but result in larger file sizes.
You can also set a Video Maximum Resolution. This determines the highest resolution allowed when optimizing your uploads. If the uploaded video exceeds the selected resolution, it will be resized down to the max resolution while preserving the aspect ratio. By default, videos are not resized.
If you want to revert your changes, you can use the Reset to Default button to restore all video optimization settings back to their original values.